A flat tire usually becomes a problem because you’re dealing with it somewhere you didn’t choose to stop. Learning how to change a tire is useful, but knowing when not to change one yourself matters just as much. The basic process is straightforward: secure the vehicle, loosen the lug nuts while the tire is still on the ground, lift the vehicle at the correct jack point, install the spare, and tighten everything to the manufacturer’s specification.
Key Takeaways
- Move completely away from traffic and onto firm, level ground before changing a tire.
- Loosen the lug nuts before lifting the vehicle, not after.
- Use only the jack points specified for your vehicle.
- Never put any part of your body under a vehicle supported only by a jack.
- Check the spare’s pressure and its speed or distance limits before driving away.
Before You Change the Tire, Decide Whether It’s Safe

If you’re on a narrow highway shoulder, near fast-moving traffic, on a steep slope, or on soft or unstable ground, changing the tire yourself may be the wrong decision. A roadside tire change puts you outside the vehicle beside traffic, and a jack only works safely when the vehicle is properly positioned on suitable ground.
AAA recommends getting as far out of the flow of traffic as possible and finding solid, level ground. A parking lot, driveway, or side street is generally a better working location than the shoulder of a busy highway.
If you can’t create a reasonably safe working area, call roadside assistance instead. A flat tire isn’t worth turning into a much more serious roadside accident.
What should you do if you get a flat on the highway?
Turn on your hazard lights, reduce speed smoothly, and move away from traffic if you can do so safely. Don’t continue driving farther than necessary on a completely flat tire; doing so can damage the wheel and other components.
If you’re stopped somewhere dangerous and have access to roadside assistance, staying out of the traffic path is more important than proving you can change the tire yourself.
What Do You Need to Change a Tire?
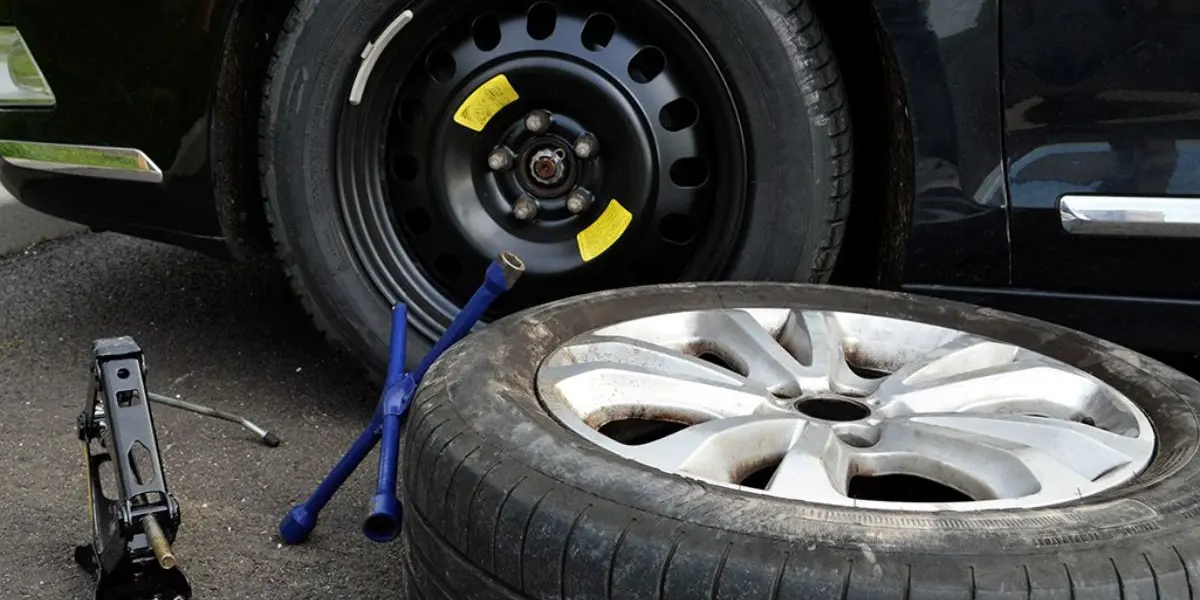
You don’t need a garage full of equipment. You need the equipment your particular vehicle was designed to use.
Basic tire-changing kit:
- Spare tire
- Vehicle jack
- Lug wrench
- Owner’s manual
- Wheel chocks, if available
- Tire-pressure gauge
- Flashlight
- Gloves
A portable inflator is useful too, particularly for vehicles equipped with a tire repair kit instead of a spare.
Before an emergency happens, actually find these items. Some spare tires sit beneath the cargo floor, while others are mounted underneath the vehicle or elsewhere. The jack and wrench may be hidden in a separate compartment.
And check the spare itself.
NHTSA recommends checking the pressure of spare tires as part of normal tire maintenance. The correct inflation pressure comes from the vehicle manufacturer’s tire-information label or owner’s manual not the maximum pressure molded into the tire’s sidewall.
How to Change a Tire Step by Step
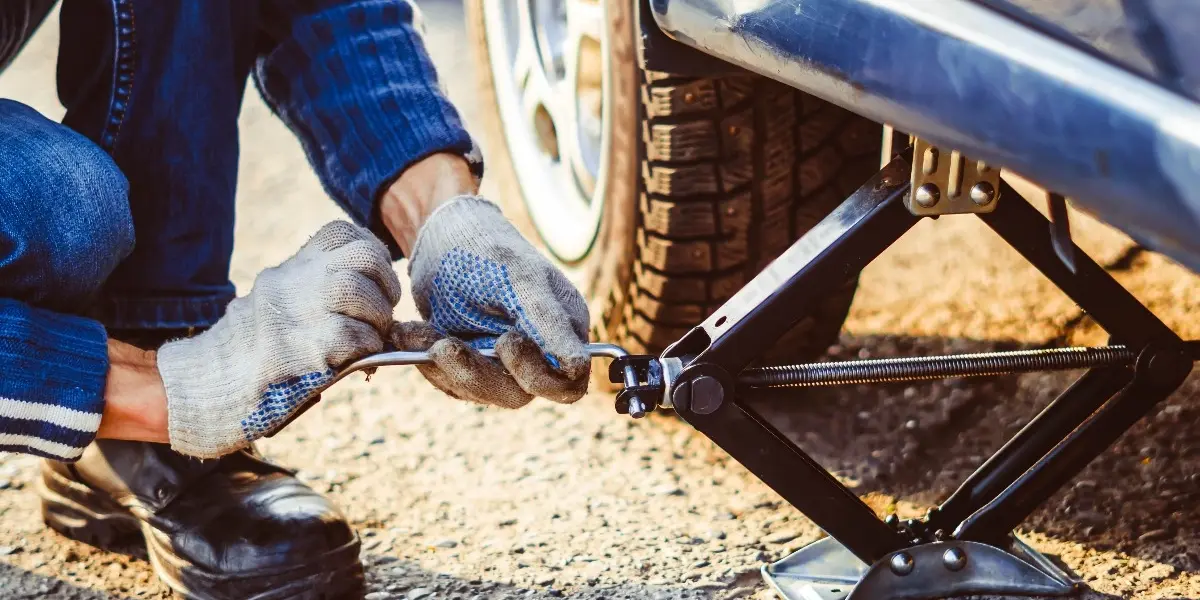
The exact hardware varies between vehicles, but the sequence below covers the standard process for replacing a flat tire with a spare.
1. Secure the vehicle
Put an automatic transmission in Park. For a manual transmission, use the gear recommended by your vehicle’s manual, then set the parking brake.
Turn on the hazard lights and shut the engine off.
If you have wheel chocks, place them at the wheels opposite the tire you’re changing. The goal is simple: reduce the chance of the vehicle moving while you’re working.
Keep passengers away from the traffic side of the vehicle.
2. Find the spare, jack, wrench, and owner’s manual
Get everything out before you start lifting the vehicle.
This sounds obvious, but it’s an easy mistake to make. You don’t want to discover halfway through the job that the jack handle is missing or that your locking lug nut requires a special key.
Your owner’s manual is particularly important here because jack locations aren’t universal. Some vehicles have clearly marked reinforced points; others require a specific position along the frame or rocker area.
3. Remove the wheel cover if necessary
If a hubcap or wheel cover hides the lug nuts, remove it using the tool intended for your vehicle.
Set the cover somewhere secure.
If one lug nut looks different from the others, stop and check whether you have locking lug nuts. The special wheel-lock key is often stored with the vehicle’s tire-changing equipment.
Without that key, forcing the lock can turn a simple flat into a roadside recovery job.
4. Loosen the lug nuts while the tire is still on the ground
This is one of the steps beginners most often get backward.
Fit the lug wrench over a lug nut and turn it counterclockwise to break it loose. Don’t remove the nuts completely yet.
The tire’s contact with the ground keeps the wheel from rotating while you apply force. Once the vehicle is raised, the wheel can spin and make an already stubborn lug nut much harder to deal with.
AAA also recommends loosening the lug nuts before raising the vehicle.
5. Position the jack at the manufacturer’s jack point
Don’t guess.
Look in the owner’s manual for the correct jack point and use the designated location for the wheel you’re changing. Putting a jack beneath the wrong piece of bodywork can damage the vehicle or create an unstable lift.
The surface matters too. The vehicle should be on firm, level ground whenever possible.
If the ground is soft, wet, uneven, or visibly unstable, that’s a strong reason to reconsider doing the job yourself.
6. Raise the vehicle
Operate the jack slowly and watch what happens as the vehicle begins to rise.
Stop after the initial lift and check that the jack is still seated correctly. If anything looks unstable, lower the vehicle and reposition the jack rather than trying to correct it while the vehicle is high.
Raise the vehicle only high enough for the flat tire to clear the ground.
And keep this rule absolute:
Never put any part of your body underneath a vehicle supported only by a jack.
NHTSA’s tire-changing guidance also emphasizes using the designated jack point, firm ground, and never getting under a vehicle supported only by a jack.
7. Remove the flat tire
Now remove the loosened lug nuts and keep them somewhere they won’t roll away.
Grip the tire with both hands and pull it straight toward you. It may be heavier than you expect, particularly on an SUV or truck.
If it doesn’t move, don’t start violently shaking the vehicle. A wheel can stick to the hub because of corrosion or dirt. If the wheel won’t come free safely, getting roadside help may be the better option.
Place the removed tire flat on the ground rather than leaving it upright where it can roll.
8. Install the spare tire
Line the holes in the spare wheel up with the wheel studs or hub.
Push the wheel onto the hub carefully. You may need to rotate it slightly to align the holes.
Don’t force the wheel or hang its weight on a single stud.
Once the spare is seated, start each lug nut by hand.
9. Hand-tighten the lug nuts
This small step prevents a surprisingly common problem.
Thread the lug nuts by hand before using the wrench. If a lug nut doesn’t start easily, remove it and try again rather than forcing it with the wrench.
Cross-threading can damage the wheel stud or lug nut.
Tighten the nuts in a crisscross or star pattern rather than going around the wheel in a circle. The idea is to draw the wheel evenly against the hub.
10. Lower the vehicle and tighten the lug nuts
Lower the jack until the tire is firmly touching the ground but the vehicle isn’t fully resting on the jack.
Now tighten the lug nuts using the same star pattern.
Once the vehicle is fully lowered, remove the jack and perform the final tightening.
For the correct tightening force, use the torque specification provided by the vehicle manufacturer. A torque wrench is the right tool when one is available.
Don’t rely on the idea that “as tight as possible” is automatically correct. Too little tightening can allow the wheel to loosen; excessive tightening can make later removal difficult or damage components.
11. Reinstall the wheel cover
If your spare uses the original wheel cover, reinstall it only if it’s designed to fit that wheel.
Some temporary spare wheels aren’t designed to accept the same cover.
Put the flat tire, jack, lug wrench, wheel cover, and other equipment back in their storage locations before leaving.
12. Check the spare before driving
This is the step that gets rushed.
Check that:
- Every lug nut is tightened correctly.
- The spare is seated properly.
- The tire has the correct pressure.
- The jack and tools are secured.
- The spare’s speed and distance restrictions are understood.
- Nothing is left beside the vehicle.
NHTSA specifically advises checking spare-tire pressure and using the vehicle manufacturer’s recommended pressure.
If you’ve installed a temporary spare, don’t assume you can drive normally just because the car feels fine.
What If the Lug Nuts Won’t Come Off?
If the lug nuts won’t budge, don’t escalate into a roadside wrestling match with the car.
First, make sure the wrench is fully seated and you’re turning it in the correct direction. Check for a locking lug nut and confirm that you have the correct key.
If a lug nut is badly seized, damaged, or requires excessive force, stop. AAA specifically advises drivers not to take unnecessary risks with lug nuts that won’t loosen and recommends roadside assistance when necessary.
The same rule applies if the wheel itself is stuck to the hub.
A tire change is supposed to get you out of trouble. It shouldn’t create a damaged stud, broken wheel, or unstable vehicle.
What If Your Car Doesn’t Have a Spare Tire?
This is increasingly common.
Some newer vehicles come without a traditional spare and instead provide a tire repair kit, sealant, portable compressor, or run-flat tires. AAA notes that many modern vehicles don’t include spare tires and may rely on a repair kit instead.
Check your owner’s manual before assuming you have a spare.
A repair kit isn’t a universal replacement for a spare. A small tread puncture may be repairable with the equipment provided, but sidewall damage or a severely damaged tire generally requires professional attention.
If the tire has major structural damage, don’t try to improvise a repair just to get moving.
Full-Size Spare vs. Donut Spare
Not every spare tire is meant to be treated like a normal tire.
| Spare type | What it means | What you should do |
| Full-size spare | Similar in size to the regular tire, although it may have different specifications | Check the owner’s manual before treating it as a permanent replacement |
| Temporary or donut spare | Smaller, lighter spare designed for temporary use | Follow the speed and distance limits printed on the tire or specified by the manufacturer |
| Repair kit | Sealant and/or an inflator intended for certain minor punctures | Follow the kit and vehicle instructions; don’t use it for major tire damage |
| Run-flat tire | Designed to provide limited mobility after loss of pressure | Follow the manufacturer’s specific driving limits |
There’s no universal distance or speed rule that applies to every temporary spare.
Some manufacturers specify limits such as 50 mph and a restricted driving distance, but your vehicle’s instructions take priority. AAA’s current guidance likewise warns that temporary spares aren’t intended for normal long-distance or high-speed driving.
What Should You Check Before You Drive Away?
Use the 5-Point Before-Drive Check:
- Lugs: Are all lug nuts installed and tightened correctly?
- Pressure: Does the spare have the required pressure?
- Stability: Is the wheel fully seated and the vehicle stable?
- Equipment: Are the jack and tools secured?
- Limits: Do you know the spare’s speed and distance restrictions?
Then drive directly to a tire shop or other appropriate repair facility if the spare is temporary.
Don’t turn a temporary spare into your new everyday tire simply because the car seems to drive normally.
Common Tire-Changing Mistakes
The procedure isn’t complicated. The mistakes usually happen around the procedure.
Lifting before loosening the lug nuts.
Once the wheel is off the ground, it can rotate. Break the lug nuts loose first.
Putting the jack in the wrong place.
The body panel that looks strong enough may not be a jack point. Follow the manual.
Using the tire’s sidewall pressure as the vehicle’s recommended pressure.
NHTSA says to use the pressure listed by the vehicle manufacturer on the door label or in the owner’s manual.
Forgetting the spare has its own limitations.
A donut spare isn’t simply a smaller version of your normal tire.
Driving away without checking the lug nuts.
The tire change isn’t finished when the wheel touches the ground. Final tightening is part of the job.
Trying to win against a seized lug nut.
Sometimes the smartest tool is a roadside-assistance phone number.
When Should You Not Change the Tire Yourself?
There are situations where calling for help is the sensible choice.
| Situation | Better option |
| Vehicle is stopped dangerously close to fast traffic | Roadside assistance |
| Ground is steep, soft, muddy, or unstable | Roadside assistance |
| You don’t know the correct jack point | Stop and consult the manual or call for help |
| Jack or lug wrench is missing/damaged | Roadside assistance |
| Lug nut or wheel is badly seized | Professional assistance |
| Tire has major sidewall damage | Tow or tire professional |
| No spare and repair kit can’t handle the damage | Roadside assistance |
| You’re uncomfortable working around a raised vehicle | Call for help |
There’s no prize for changing a tire yourself in a dangerous location.
The useful skill isn’t just knowing the 12 steps. It’s recognizing when conditions have moved outside the range where those steps are safe.
How Long Does It Take to Change a Flat Tire?
For someone who knows the vehicle and has working equipment, a basic tire change can be fairly quick. But there’s no honest universal time because conditions make a huge difference.
AAA notes that changing a flat can take anywhere from about 15 minutes to 2 hours depending on the vehicle, tools, familiarity, and circumstances.
A first-time driver shouldn’t race the clock.
If you’re working at night, in rain, on uneven ground, with stubborn lug nuts, or with unfamiliar equipment, safety matters more than beating an arbitrary time.
FAQs About Changing a Tire
Do you loosen lug nuts before jacking up the car?
Yes. Loosen them while the tire is still on the ground. The vehicle’s weight keeps the wheel from rotating while you break the lug nuts loose.
Where should I put the jack?
Use the jack point specified in your owner’s manual. Jack locations vary between vehicles, so don’t assume the same position works for every car.
How tight should the lug nuts be?
Tighten them to the vehicle manufacturer’s specified torque. A torque wrench is the most reliable way to achieve the correct value.
How fast can I drive on a donut spare?
Follow the limit printed on the spare and the instructions in your owner’s manual. Temporary spares commonly have lower speed and distance limits than normal tires.
Can I drive on a flat tire to a repair shop?
You generally shouldn’t drive farther than necessary on a completely flat tire. Driving on it can damage the tire and wheel, and may create additional vehicle damage.
What if my car doesn’t have a spare?
Check whether it has a tire repair kit, inflator, or run-flat tires. If the damage can’t be safely handled with the equipment provided, contact roadside assistance.
Should I check the spare tire pressure?
Yes. NHTSA recommends checking spare-tire pressure as part of tire maintenance. Use the vehicle manufacturer’s recommended pressure rather than the maximum pressure printed on the tire.
Do I need to replace the flat tire immediately?
That depends on the damage and whether the tire is repairable. After installing the spare, have the damaged tire inspected by a qualified tire professional rather than assuming it needs replacement.
The Bottom Line
Knowing how to change a tire is useful, but the real skill is knowing where the procedure stops being a sensible DIY job.
The mechanical part is fairly simple: loosen, lift, remove, install, tighten, check. The judgment part is harder. You need to recognize unsafe traffic conditions, unstable ground, damaged equipment, seized hardware, and the limitations of a temporary spare.
That’s the difference between memorizing a tire-changing checklist and actually being prepared for a flat.